Here at DIY Guides we’re going to be getting into some tech related things along with our regular home improvement articles and guides. We’re going to be doing computer basics along with other tech related guides and articles. To start this off with I’ve got a guide to help you save some money, about $90 to be precise. The Xbox 360 recently was upgraded to allow for a capacity up to 250gb, but Microsoft charges a ridiculous amount of money for their ‘official’ hard drive upgrade. I stopped over NewEgg and found the 250gb Xbox 360 hard drive going for about $132 with shipping. Then I went and looked at the bare drives, a 250gb will cost you around $45, so that’s about $90 that Microsoft is charging you for the plastic casing essentially, more than that actually since they don’t pay retail price for the drives like we do, they get a nice bulk discount. Is that fair? I don’t think so, and neither do most people out there. Today I’m going to show you, step-by-step, how to take one of those $45 hard drives and get it to work with your Xbox 360, essentially saving you about $90.
Disclaimer: This guide is just a guide on how to do this. I/We are not responsible for anything that happens to your equipment or accounts as a result of following this guide. I’ve done it myself and know other people that have and it works if followed correctly. You might wonder if your console could be banned because of this ‘hack’, there’s no definite answer, anything can happen. As of now though I haven’t heard of anyone having any issues through doing this. As far as I know, Microsoft is more concerned about actually hacking of consoles where you can play backups and illegal games and cheating, this is none of that. All you’re doing is replacing one hard drive with another and not voiding warranties or modifying your console. Again though, we’re not responsible for anything that might or could happen if you follow this guide. We also have nothing to do with Microsoft, nor is doing this supported by them.
Now that’s out of the way let’s get into the guide part.
Step by step guide to upgrading your Xbox 360 hard drive
This guide assumes you already have a hard drive on your Xbox 360 as you’ll be using the hard drive housing from it. If you don’t have a hard drive on your Xbox 360 though you can get just a housing cheaply on Ebay, but of course the cost of this modification will rise slightly. The idea is to keep the cost down here of course.
The process shouldn’t take longer than 30 minutes really, but it all depends on how much stuff you have to transfer to the new drive. If you’re old 120gb is full, transfer time could be longer of course. The drive has to be a certain model Western Digital Brand to work, but they’re are several to pick from:
– WD Scorpio Series BEVS/BEAS
– WD Scorpio Blue Series BEVS/BEVT/BPVT
– WD Scorpio Black Series BEKT/BJKT
– WD VelociRaptor Series
– WD AV-25 Series BUDT
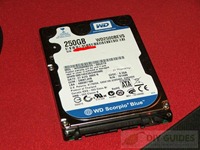
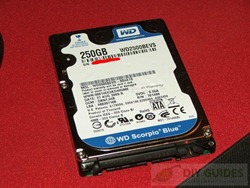
The one I used I actually got for free, it was inside of an external enclosure I got for review on another site, so for me this upgrade was essentially free. The drive is the Western Digital Scorpio Blue WD2500BEVS. (For obvious reasons I marked out the serial numbers on my devices.)
The first thing you’ll need to do is buy a 250gb hard drive, NewEgg is probably the cheapest place to grab one and they frequently have sales, in fact they just had one on sale last week that would work great with this project.
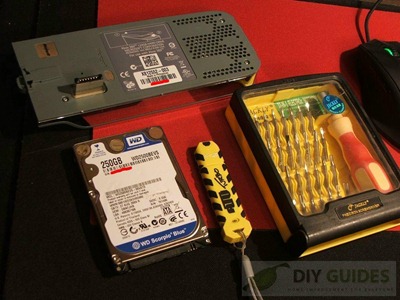
There are four basic things aside from your original Xbox 360 hard drive you’ll need, a USB drive, a 250gb and two Torx style screw drives sizes; T6 for the outside casing and a size T10 for the inside of the hard drive casing. I have a specialized kit of these types of screwdrivers, but you can purchase them separately and inexpensively many places.
Once you have all of that collected you’re going to need a few pieces or software and firmware images to complete the process. I’ve uploaded them to MegaUpload in both WinRar and Zip formats just in case you don’t have WinRar, so grab what you need and uncompress them.
Bootable USB Creator Tool (RAR) http://www.megaupload.com/?d=ZT48X0DE
Bootable USB Creator Tool (ZIP) http://www.megaupload.com/?d=EB0VVH5H
HDDHackr v1.24 Build 20100904 (RAR) http://www.megaupload.com/?d=XMDSCMJM
HDDHackr v1.24 Build 20100904 (ZIP) http://www.megaupload.com/?d=5BIXF18E
Xplorer 360 Extreme (ZIP) http://www.megaupload.com/?d=IGH6W2GT
Xplorer 360 Extreme (RAR) http://www.megaupload.com/?d=PHMCC0MK
Xplorer 360 250gb Edition (ZIP) http://www.megaupload.com/?d=60QLURHO
Xplorer 360 250gb Edition (RAR) http://www.megaupload.com/?d=SCDPQR7Y
Xbox 360 250GB Hard Drive Security Sector (ZIP) http://www.megaupload.com/?d=2HYMZAFY
Xbox 360 250GB Hard Drive Security Sector (RAR) http://www.megaupload.com/?d=H4SZRR9C
There’s another thing you might need as well if you don’t already have it and that’s the original Xbox Emulator so you can play Xbox Classic games on your Xbox 360. This only pertains to those that have the Arcade version of the Xbox 360, if you have another versions you most likely already have the emulator on your Xbox 360. Of course if you don’t play original Xbox games then you won’t need it at all either. I didn’t upload it anywhere, but you can grab it from over here: http://digiex.net/downloads/download-center-2-0/xbox-360-content/apps/4897-xbox-360-partition-2-download-xbox-1-emulator.html There’s some info there as well about it and how to use it, but nothing that has to do with this guide here today.
At this point you should have a few folders on your Desktop, two for Xplorer 360 Extreme, one Bootable USB Creator Tool, one that is HDDHackr v1.24 Build 20100904 and finally the actual firmware for the hard drive or Xbox 360 250GB Hard Drive Security Sector. The names might be a little different, but it’s what your should have.
In the above picture with the USB drive, that was an OCZ ATV Turbo, but in the following part you’ll see I was using an ATP Tough Drive 1gig USB drive. The reason for this was for my own purposes, I was curious as to if it would work with FAT32 or FAT file systems. Yes FAT32 worked for me, but it doesn’t work for everyone so for your purposes in this guide you’ll be formatting your USB to FAT and NOT FAT32.
In the folder with the Boot Creator Tool you’ll also find another folder labeled USB Drive Boot Files with two folders in it.
Put your USB drive in and load up Boot Creator. Set File System to Fat, the name doesn’t matter. Check the box for Create Bootable Drive and then press the box to navigate to the Bootable Creator Tool folder and find the folder labeled MS-DOS, then just hit start.
You’ll get a warning, just hit yes, then in a few seconds you’ll get the confirmation that it was completed.
Once that’s complete open up your USB drive and it will be empty, but you’re going to add some files to it.
Open up the HDDHackr folder and put those files onto the USB drive, then open up the Security Sector folder (named HDDSS-ZIP or HDDSS-RAR) and put the image file named HDDSS250GB.BIN onto the USB drive, and your done.
Now you’re done with the Windows part of this until later, for the next few parts you’ll be working in DOS from the USB drive your just created.
You’ll need to open up your computer and attach your new 250GB hard drive to it. It might be a good idea to unplug the other drives in your system so you don’t accidentally flash the wrong drive. The next step may or may not work, depending on how your BIOS is set to read hard drives. Some people have experienced issues with flashing the drives when they are set to AHCI. Basically newer computers will have the drives set to AHCI, but that doesn’t work all of the time for our needs here. You’ll need to go into the BIOS and check to see how the drives are set and set them to IDE or Legacy or Enhanced, the wording might be different but one of those labels should be there.
While you’re in the BIOS you could change your boot setting to boot from USB or removable media. You don’t have to do this as you can boot from the USB drive when your computer turns on. On my computer I press F11 to access the boot menu and then I can select what I want to boot first, other computer are different but many times it will tell you right on the post screen when your computer turns on.
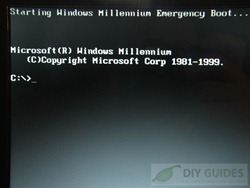
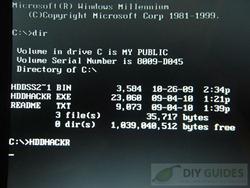
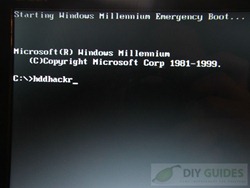
When you boot from the USB drive you’ll then be into DOS with a prompt waiting for you.
I hit ‘DIR’ to check the USB drive and see everything was really there I needed, my BIN file is named differently than the one I have set for download for you in this guide, but it’s the same. You can do that or just type HDDHACKR and hit return to run the program.
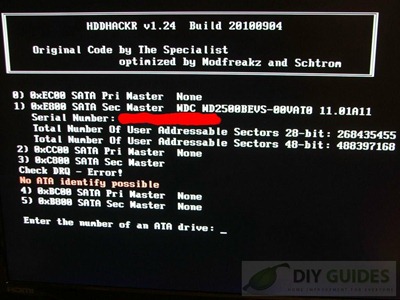
I unplugged my drives as I suggested you do so there’s on the Western Digital listed in the following pictures which would be number 1. Next step is just enter the number of the drive you want to access. Ignore the error there, that’s just my system.
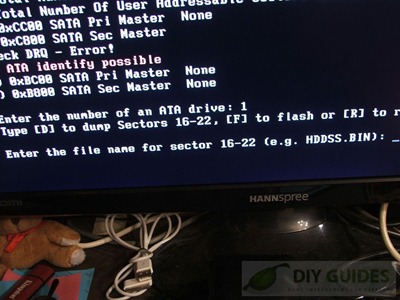
After you press the number you’ll get a question with three options for D to dump sectors, F to flash and R to restore firmware. You’ll want to choose ‘F’ since we’re flashing the drive.
The next step is to tell the program what file you want to flash the drive with and that would be HDDSS250GB.BIN
Then you’ll enter the name of the Restore file as well, you can just use the default UNDO.BIN that is in the example. You might want to keep the Undo.bin file somewhere safe as once you’ve completed everything it can be used to return the drive back to its original state like when you bought it.
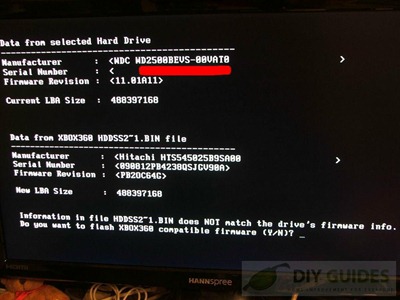
Hit enter and you’ll see information about the current drive you bought and about the firmware you’re flashing it to or with. At the bottom you’ll be asked if you’re sure you want to do this since the firmware doesn’t match, just press ‘Y’ for yes and hit enter.
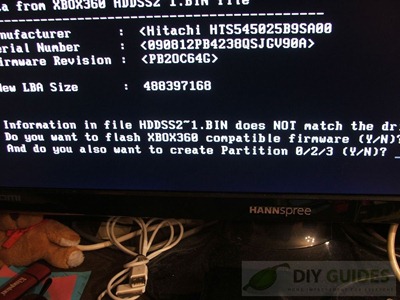
Then it will ask you if you want to create Partitions 0/2/3 to which you’ll also say type ‘Y’ or say yes to.
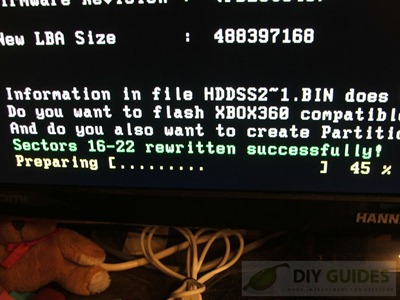
Once you hit enter it will start working, the process takes maybe a minute or so to complete.
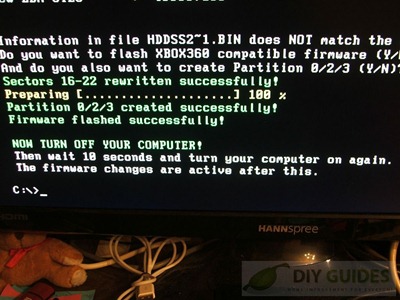
When the process is finished you’ll need to turn the computer off, wait 10 seconds and then power it back on, this completes the flashing process. Then you can just turn your computer back off at this point, make sure though you go back in and hook your drives back up and go back into your BIOS and change the settings back if need be.
Next is to take apart your Xbox 360 hard drive enclosure and access the hard drive inside.
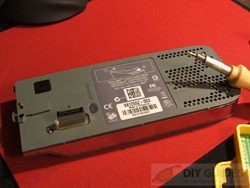
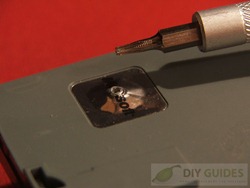
Here’s where those two Torx screwdrivers come into play. You’ll need the number T6 first to open up the plastic outer casing. Three screws should be visible and the fourth will be under a Microsoft security seal, yes you’ll be voiding the warranty of your hard drive obviously, but you won’t be using it anymore either.
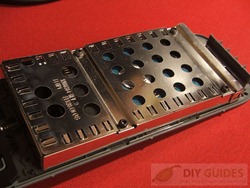
Once you take the plastic cover off you’ll see a metal casing now that you’ll need the Torx T10 for. There’s four screws here as well, just take them out and lift off the cover.
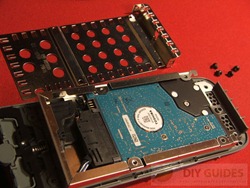
To get the drive out you’ll need to lift and pull at an angle, be careful not to pull the wires too far out. You can slide it out a little bit, disconnect the drive and then continue removing it from the chassis.
The next part is optional, but it’s what I did. I took my new 250gb drive and temporarily into the housing, you don’t have to put the screws back in but you have to make sure it’s connected. I attached it to my Xbox360, turn it on and it was seen, but what I did was format the drive via the Xbox 360 storage settings. You don’t have to do this step, it’s just what I did.
Either way, if you do it or not, the next step would be to take your original Xbox 360 hard drive, the one you just removed from the housing, and attach it to your computer like you did with the 250gb drive. You’ll need access to Windows so make sure your other hard drives are hooked back up.
Once you’re back into Windows you may or may not see the hard drive in ‘My Computer’. If you don’t see it, don’t worry, it’s there, I didn’t see it in mine.
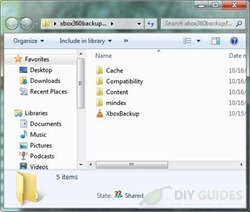
I next created a folder on my desktop called ’XboxBackup’. You’ll take the stuff from your original hard drive and put it in there to transfer to the new 250gb later.
You’ll now need to open Xplorer 360 Extreme (not the 250gb version). You must also open it with administrative privileges. I\’m using Windows 7 so it’s right-click on the program and ‘Run as Administrator’. You’ll need to do this with the 250gb version as well, so don’t forget.
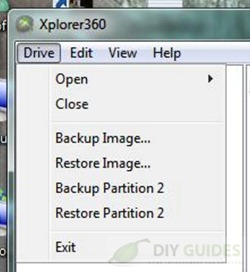
Once the program starts you see four options at the top, Drive, Edit, View and Help. Click Drive, the Open and then Harddrive or Memcard…
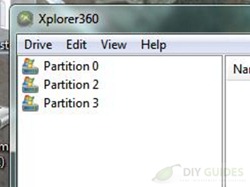
When it opens the left panel will show three Partitions 0, 2 and 3. You don’t have to worry about 0 or 3, in fact don’t touch either one of them right now.
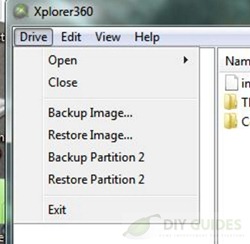
Once you see the Partitions listed, hit Drive again at the top and select Drive, the select Backup Partition 2 and select where you want the backup to go.
After you hit Save let it work.
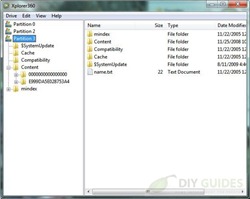
After that is complete you’ll want to back up your saves, profiles, DLCs etc. Expand the Partition 3 now and you’ll see several folders.
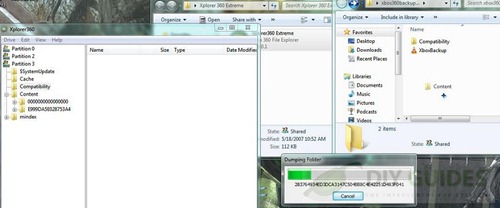
The Compatibility Folder has to do with original Xbox games, saves and content. The folder with just a bunch of Zeros is the one that has your arcade games, DLC, Demos and Videos etc. The folder that starts with ‘E’ is your profile, there may be more than one. I have one profile on my Xbox 360, so there’s only one folder that contains my profile. I learned that I cannot share my Xbox 360, so my kids have their own. Those are the folders you’ll want to take over at the minimum, personally I transferred everything over from the left side of the interface to my backup folder. You just drag and drop like you would any other file transfer. This process can take quite a while as you’re into many gigs of stuff, so sit back and let it work.
Once that process is complete you’ll need to turn your computer off yet again, unhook the original hard drive and hook up the new 250gb one that you prepared earlier, then boot back into Windows.
This time you’ll open the Xplorer360 250gb Edition. Remember to Run as Administrator. One note, don’t touch any other partitions as you could corrupt the hard drive. It’s not that big of a deal, as you can hook it back up to your Xbox 360 and re-format the drive, but that’s time consuming so don’t mess around with anything please.
We backed up Partition 2 earlier, now we have to Restore it to the 250gb drive. Pretty much the same process Click Drive and then open the harddrive as you did before. Once it’s open then you press Drive, and this time you’ll select Restore Partition 2. navigate to where you saved it and let it work.
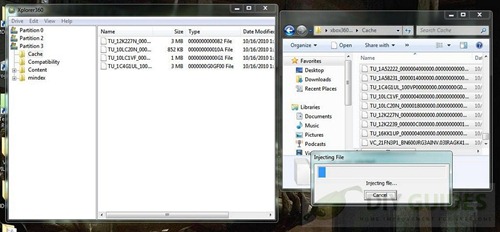
Remember how long it took to transfer the things from your hard drive, well you need to repeat that process except backwards now, going from the folder to the drive. Again this is just drag and drop and you’re doing what is called ‘Injecting’ . I took them from my folder to the Right side of the interface, not the left side. Here again this process can take a while depending on how much you’re transferring.
Just let it work. Again don’t do anything to partition 0 or 2, or you’ll corrupt the drive.
When the process is complete you’re finished. Turn off your computer, remove the 250gb hard drive and put it back into the Xbox 360 enclosure and then install it back into your Xbox 360.
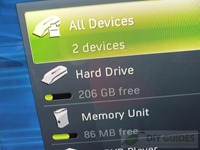
You’ll of course want to check everything works, so go into your settings and you should see the drive listed there. The capacity will vary depending on how much transferred over.
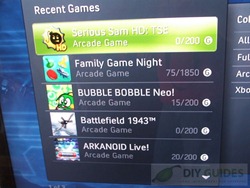
I went and checked as well to see if my Arcade Games were there, and yep there they were!
Everything was there just as I had on my 120gb drive, no problems at all, and if you followed the guide you should be fine as well.
One note, I did find that I had to re-activate Netflix after the upgrade, other than that I have no issues.
The end result: a very cheap upgrade of your xbox 360 hard drive
So for about $50 and some of your time you can save almost $100, that’s not too bad I think. Sure it would be a lot easier to just go an buy one, but where’s the fun in that? This way you can say you did it yourself!
Also if you fancy voicing your opinion then get on over to the Quick Ten and take a look at the Top Ten Gaming Consoles of all Time!













Would this modification work for other size Harddrives, or is it only compatible with the 250GB. I ask in reference to the cheap availability of much large drives making it where you would not have to do this upgrade for a much longer time. I am also curious if there is a way to make it so that you can play without the cd. Thanks.
Everything Works fine for me! But when i trying to put my saves, profile, games, etc. it does nothing!!! It looks like it is Injecting but nothing is in there!!! can i get some help???
No you can only use the sizes that the Xbox360 can see.
Does it matter which RPM HDD you use? I believe the original drives are 5400 RPM, but would a 7200 RPM drive work?
@george
the supported list of drives at the top of the page, shows the black series, which are 7200 rpm.
– WD Scorpio Black Series BEKT/BJKT
can get a WD2500BEKT on newegg right now for $49