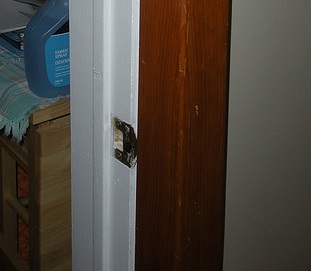
Remove A Door Jamb
Every door has its own door jamb. A door jamb works as the main support for a door frame. A door frame comes with two jambs whereby one is located on the side where the hinges are and the other can be found on the side where the locking mechanism is. The door jambs are basically to secure the frame into the wall better. These two jambs are connected through the head.
Removing a door jamb is not a difficult process. A door jamb is made by several materials, but removing it we have to determine its type and the door type as well. The door jamb can be found hidden by either a casing or a trim. There are different types of door jambs and the most common one used is the hollow metal door jamb. These hollow metal door jambs are mostly made of cold-rolled steel that are mainly used for interior applications.
A damaged door jamb is no fun to have. To fix a damaged door jamb, it has to be removed first. After removing the damaged door jamb, the spot needs to be cleaned and then only the new door jamb can be inserted and placed. If you have the right tools and steps, it is not as hard as it seems. Don\’t forget to take the needed protection steps first. Here are the steps on how to do it.
You will need:
- Putty knife
- Hammer
- Wood chisel
- Hacksaw blade with handle
- Hand saw or power saw
Steps:
- First, break the seal of the paint on the door jamb between the molding and the jamb, and between the molding and the wall with a putty knife. With the same putty knife, pry the molding away from the door jamb and the wall until the nails are exposed.
- Then, use a hacksaw blade to saw each nail attached to a handle between the molding and the wall. This will keep the front of the molding intact. If you are not concerned about keeping the integrity of the door jamb, the alternative way is to remove the nails with the claw of a hammer.
- Next, cut across the side of the jamb horizontally a couple of inches from the top jamb using a handsaw or a power saw. This will break off the side jamb from the top jamb.
- You can start prying off as much as you can of the side jamb from the wall. Use a hammer and a wood chisel to gently split the rest of the jamb until it can be detached. For the other side of the jamb, repeat this process until you have removed the entire door jamb from the sides.
- You could also remove the top jamb as well if necessary. Alternatively, you can just fit the new side jambs onto the wall. Let them fit into the top jamb as long as it is not damaged.
Image Credit:
Flickr
Additional Reading:
Build Like a Pro Windows and Doors: Expert Advice from Start to Finish (Taunton\’s Build Like a Pro)
Installing and Hanging Doors (For Pros By Pros)

