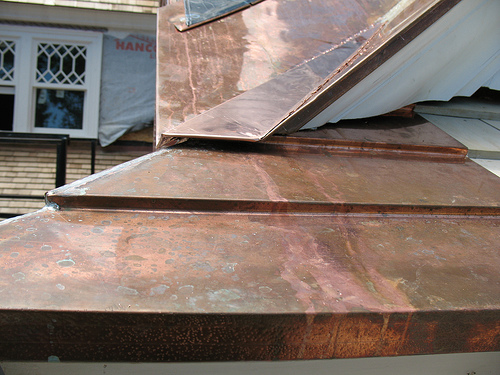
Whenever you want to install valley flashing for you roof, you must always follow the instruction provided by the manufacturer of your roofing materials before starting to do any installation. It is important to install flashing on the roof of your house because it helps you prevent moisture from seeping through the roof and resulting to rotting any of your under-laying materials that would cause leaking. Your roof valley (the channel for rainwater to go through before ending up in the drain) area is a sensitive area due to it being a point of meeting between two roof faces. You should make sure that water-proofing of your roof valley is done properly so that your roof will last for long period of time. For example, you can start your installation by laying the roof underlayment over your wood sheathing before placing the flashing on top of it and followed by the shingles or by using other roofing materials of your choice. In order to do installation of your valley flashing on the steel roof, you are required to follow several steps so that you would be able to prevent any premature deterioration of the roof valley flashing. Below are some tips that you learn for installing roof valley flashing that can last for a long period of time.
To install roof valley flashing, you need:
- Roofing paper
- Aluminum flashing
- Galvanized roofing nails
- Asphalt cement
- Chalk line
- Utility knife
- Shingles
- Hammer
- Staple gun
- Staples
Install Roof Valley Flashing
Installation Guide of Roof Valley Flashing
- The first thing that you need to do is to take some measurement on the length of your roof valley.
- This is to help you to calculate the amount of valley flashing that you really need to use.
- This is to help you to calculate the amount of valley flashing that you really need to use.
Make sure that you include extra 4 inches for each overlapping piece that you need to use in your installation steps.
- Next step is for you to install valley battens on each side of the location that you decide to install the valley flashing.
- Then, the valley need to be attached onto the top flange.
- Make sure that you extend at least 3/4-inches just over the flange edge.
- For those of you who have a fascia, you would be able to extend the valley past it with a length approximately 3/4-inch.
- Then, you have to scribe the roof valley flashing to the fascia whenever you feel that it is necessary to the task.
- Then, the valley need to be attached onto the top flange.
- After that, you are required to set the roof valley flashing into a bed of caulking.
- Then, you need to use metal roofing nails in order to attach your roof valley flashing on the flange.
- Next, for any slope of roof that you need to install will be overlapping with each with the minimum length of approximately 4 inches.
- Then, you need to use metal roofing nails in order to attach your roof valley flashing on the flange.
- When you want to lay the lap of your roof valley flashing, you need to take into account the height of the pitch where the lower it is, the greater the lap that you need to use in order to safe guard your roof from ice dams.
- You should be spraying granules on any cut materials that you use so that you could eliminate premature rusting of the materials.
- Ensure to use caulk if you notice there are any gaps especially during any of the installation process.
- This is to prevent any infiltration of water beneath the flashing that you have installed.
Always remember that whenever you want to install roof valley flashing,
- Whenever your roof valley terminates on a lower panel of the roof, you need to lay that panel first before installing the roof’s upper valley flashing.
- You need to know that flashing for different types of roofing would require using different technique of installation. Always refer to the manufacturer for suitable roofing materials to use along with the valley flashing.
- Ensure to use caulk if you notice there are any gaps especially during any of the installation process.


