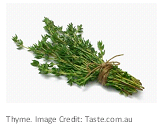
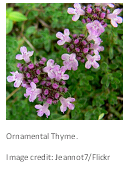
Herbs have played a central role in the culinary world. They provide enhanced taste and are a great way to season foods. Herb gardens can be as small as a potted container to a 4 by 6 feet patch in your garden. Herbs are grown not just for their use in cooking but also for the pleasant aromatic properties. Herbs are used as garnish in salads to enhance the flavors of vegetables or to add flavor to meats and stews.
Herbs are classified as follows:

Culinary Herbs – have strong flavors, and are used in small quantities to add flavor. Examples: parsley, sage, chives, thyme, savory, marjoram, mint, and basil.
Aromatic Herbs – Aromatic herbs have pleasant smelling flowers or foliage. The oils from aromatic herbs are used in perfumes, toilet water, and various scents. They can be used intact or dried. Examples include mint, marjoram, lovage, rosemary, and basil.

Ornamental Herbs – They have brightly colored flowers and foliage. Examples: Valerian, borage, chicory, thyme, mint, lavender, and chives all produce variegated foliage.
Medicinal Herbs – While some studies have shown that some herbs have healing properties, others should be used carefully with knowledge as others can be dangerous if consumed.
Preparing Your Herbs for Use
- Begin drying your herbs for use over the cold winter months by cutting off the tops of the leafy varieties by midsummer.
- Wash them off with cold water, and then hang them until the drops of water evaporate.
- Tie the stems of your cuttings together. Bag them in a paper bag or a muslin bag (with the stem ends at the opening) and tie the opening with a rubber band. This will help prevent insects from getting at them.
Tip: You can make the muslin bags yourself. Cut out rectangle-shaped muslin, fold and sew one the side and the bottom. Make sure you cut the bag to size of the amount of herbs you are drying.
- Hook the bag up with a paper clip (through the band) and place the bagged herb on a line where you can leave them to dry. Make sure you place them somewhere that is dry and shaded (meaning indoors).
- Leave the bag of herbs to dry for a bout 2 or 3 weeks. Then remove the herb from the paper bags.
- Discard woody pieces of stalk, and crush the leaves finely with a pestle and mortar. Place them on a shallow pan and dry out in the oven with a setting that is warm enough to dry them further without burning them. DO NOT set at over 100 degrees temperatures.
Note: You may also try drying herbs by spreading them out on trays or over sheets of hardware cloth covered with cheese cloth in a dry area.
For seed heads, allow them to grow until seeds are mature and ready to drop from the plant. Then cut the seed heads on a very dry day and spread them on clean paper. Keep the seed heads in the sun on the first day. This is so that little insects which may be dormant in the heads will leave as the seeds dry out.
You should then store the herbs in glass jars or any other airtight containers in a cool, dry place.
More Reading:
Growing Herbs in the Home Garden:
http://www.wvu.edu/~agexten/hortcult/herbs/ne208hrb.htm
Growing and Storing Herbs in Winter:
http://www.doityourself.com/stry/herbgardens

