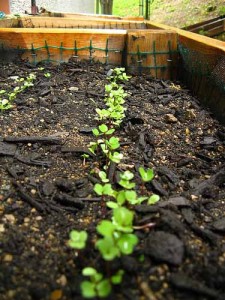
Mesclun salad is a mixture of small, young salad greens that may include lettuce, spinach, frisée, arugula, mustard greens, endive, Swiss chard, dandelion, or sorrel. The word \’mesclun\’ originates from the Southern French word \’mescla\’ which means “to mix.”
You can cultivate your own mix of salad either indoors or outdoors. When planting salad greens outdoors, monitor the soil temperature to know when you can start sowing the seeds. Taken at a depth of two to three inches below ground surface, the best time to sow the seeds is when the soil is between 32 and 40 F. The bed needs to be kept moist (but not wet). This ensures a tastier and tender crop.
You need to only seed as much required for a weeks supply of salad; successively sowing seed each week ensures you a supply of mature greens you will use for a week at harvest time.
How to Sow Mesclun Seeds
- Prepare the bed of soil in your garden before seeding. This includes mixing compost, fertilizer, and making sure that your soil is in optimal condition (texture wise) for green salads to grow. If you have soil that collects too much water, consider planting on raised bed instead to encourage water drainage. You want to make sure that the soil stay moistened through out the growth of your salad, but not soggy wet.
- Once you have the soil prepared, its time to sow the seeds.
- Hold out your hand about a foot above well-worked soil and scatter the seeds. While you do not need to have an accurate measurement, try planting roughly 1/4- to 1/2-inch apart as this will help crowd out any weeds.
- If you plan on sowing in rows, dig furrows about ¼ inch deep, drop the seed inside and cover with compost mix.
- Cover the area where you\’ve scattered the seeds with about ¼ inch soil.
- Water the bed gently with fine spray. Make sure that the soil is evenly watered until the seed germinate which take place normally within the week.

Protecting your crop
A mesclun salad bed is like an open invitation for a buffet for birds. Birds love the baby leaves so you will need to provide some sort of net protection to the bed so that you can enjoy the fruits of your labor.
You can do this by constructing a small hoop house over your bed with flexible PVC pipes and plastic coverings. Refer to chapter on how to construct a mini hoop house.
You can also consider draping lightweight netting over the frame instead of plastic as plastic may trap too much heat inside the protected area. Garden staples work well to hold the netting in place.
Protecting your bed of salad green this way also helps extend harvest as they help protect the tender greens from harsh afternoon sun in the summer.
Harvest
Mescluns are ready for harvest after about 35 to 45 days after planting. Harvest them early in the morning before the sun is high as heat can cause wilting of the leaves.
Also harvest when the greens are two inches long. Do not let them grow more than six inches tall.
- Using scissors with long blades is recommended.
- Cut off a handful of the tops of the leaves and leave about one inch of plant above the ground. This cut-and-come-again method will allow the crop to grow back. All you have to do is to water and lightly fertilize (with diluted fish emulsion) after harvesting and you will be provided with greens ready for harvest again the next time around.
- Cut as much mesclun as you need.
- Your bed of mesclun greens will provide you with about three harvest. After these 3 harvests, pull everything up, throw it on the compost pile to make natural compost and sow yourself another crop.
- Rinse the greens in cool water to remove dust or dirt and drain on towels or pat dry.
Storing Mesclun
Mesclun salad is best used when it’s just been harvested. To store Mesclun, seal the greens (after making sure that they’ve been wrung dry enough (do not store soggy greens) in a plastic bag and place in the refrigerator. These will stay fresh for several days.
Tip: slightly wilted Mesclun can be revived by placing them in cool water for about ten to fifteen minutes, they will become crisp again.
Eating
Mesclun salad is a great base for you to work on when it comes to tweaking the different flavors and textures by blending the salad with a variety of condiments.
From lettuces, curly endive, arugula and more, you have an array of choices to choose from to plant and enjoy. Choose a mesclun mix that will be appealing to you, remembering that the more varied your choices are, the more flavors you can attain in your salads. No two salads will ever be the same with a great Mesclun mix.
More Reading:
Growing Mesclun: http://www.hgtv.com/landscaping/growing-mesclun/index.html
Grow Your Own Spring Salad Mix: http://www.gardenguides.com/how-to/tipstechniques/vegetables/salad.asp
Hamilton, George W. “Mesclun, A Blend of Salad Greens”. Network Publications Inc. 1999.
Lawton, Barbara Perry. “Year of the Mesclun”. National Garden Bureau, Inc. 1998.
Ogden, Ellen & Shepherd. “The Cook\’s Garden”. 1999.
Rindels, Sherry. “1997 – Year of the Mesclun”. Horticulture and Home Pest News. Iowa State University. 1997.
Grow Your Own Salad Greens:
http://www.hort.wisc.edu/mastergardener/features/vegetables/lettuce/lettuce.htm

