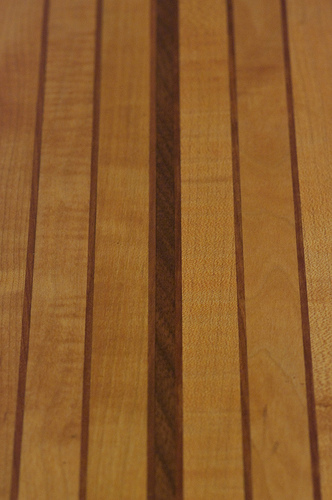
For people who are creative enough, they will definitely try to make a cutting board from tree on their own. It is a fun project that you can indulge in and make use of any small pieces of wood that you can cut from any type of tree such as oak, maple, purple heart, walnut, teak, jatoba, cherry, beech as well as bamboo. People tend to create wooden cutting board not only to be used in their kitchen but also can be used as décor to the kitchen itself. If you decide to make cutting board from a tree that comes from your backyard, you can simply make more than one because this extra wooden board can also be good emergency gifts whenever there are unexpected events that require you to gift it as presents to your guest.
To build wooden cutting boards, you need:
- Chainsaw or bow saw
- Planer
- Random orbit sander
- Recovered fallen tree trunk
- Safety glasses
- 50-grit and 120-grit sandpaper
- Tack cloth
- Food-safe butcher block conditioner
- Clean, soft cloths
How to Build Wooden Cutting Board
Building your Own Wooden Cutting Board from Tree
- The first thing that you need to do is to take your chainsaw or bow saw to cut your downed tree into several pieces of wooden board with the thickness of at least 4-inches.
- You must cut through the tree trunk completely.
- Once you have finished, you will be having a roughly circular slab with the heart of your tree trunk right in the middle surrounded by concentric growth rings along with a perimeter of bark.
- You must cut through the tree trunk completely.
Always remember to wear safety glass whenever you are working with slabs.
- After that, you need to pass the slab through the planer and make sure to set the planer’s height that would be able to allow all but not the highest slab to be able to pass through it.
- The above step must be repeated until the slab is flat on one of its side.
- The above step must be repeated until the slab is flat on one of its side.
- You must also turn the slab over in order to repeat the same process until both of its faces are flat.
- The next step is to take an orbit sander so that you can sand each of the slab’s face.
- You need to use a progressively smoother grits that start from 80 grit and stopping at 220.
- Once finished, you need to wipe off the dust by using a tack cloth.
- You need to use a progressively smoother grits that start from 80 grit and stopping at 220.
- Then, you need to apply to the entire board with a food-safe finish.
- For example, you can use mineral oil or a specialty food finish. Using the mineral oil enables you to periodically reapply the finish.
- Meanwhile the top and sides of your board must be applied with another level of coat once it has dried completely before you start o coat the bottom side.
Always remember that whenever you want to build your own wooden cutting board,
- Make sure that you always protect yourself whenever you are working with wood or tree trunk. Always wear eye protection along with a respirator during any task of cutting, sanding as well as doing the finishing for your cutting board.
- For example, you can use mineral oil or a specialty food finish. Using the mineral oil enables you to periodically reapply the finish.


