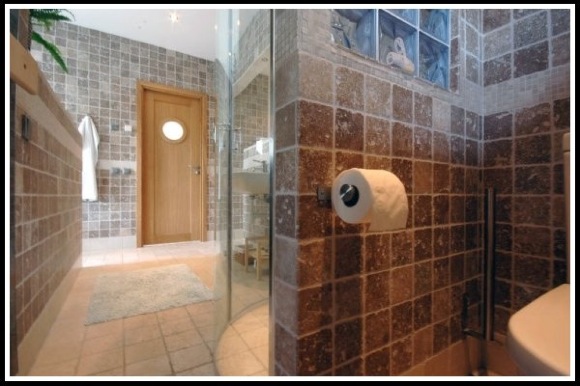
Your first step to bathroom tile design is to plan ahead of time to make the actual installation run smoothly. First you must identify which kind of style you want your bathroom to be, then select your tiles, and finally getting the materials and tools needed for the actual installation.
Identifying bathroom style that fits you
Look through web resources, design books or home improvement programs to get an idea of what kind of bathroom you like. Note what you see (or take clippings of magazines) and keep them in a file which you can use as reference when you go out and purchase the tiles that you want. Take your time deciding what you want, and make sure that the final design will be something that you will enjoy seeing in your new bathroom.
- If you want a minimalist and streamlined look, consider getting tiles with solid colours. A slight accent can be given by choosing tiles with borders that are of a different colour than the tiles to create a noticeable design.
- For a contemporary look, choose tiles with bright and bold colors with simple designs and graphics. Add bathroom fixtures that compliments the modern appearance of your bathroom.
- Soft-coloured tiles (pastel) with matching handcraft sink and wood flooring (if you choose hardwood or vinyl with hardwood look) achieves a romantic Victorian-style bathroom.
- Terracotta bathroom tiles with a Mexican handcrafted flooring system will give you a Mediterranean look.

Selecting your bathroom tiles
When selecting your tile, make sure that they are non-porous and durable. Ceramic tiles or stone tiles can give your bathroom and elegant feel although they can be cold to the touch. Ceramic tiles offer good resistance to dampness. Consider tiles with slip-resistant surfaces for superior bathroom safety.
Choose a shape that compliments the size of your bathroom. Get small tiles if you have a small bathroom. Narrow and diamond-shaped tiles can perfectly accent your bathroom and make it look bigger as well.
Getting the materials and tools for installation
- Take measurements of your bathroom area like the floors, walls, and ceiling before you purchase the material you need for your tiling project.
- Calculate the number of bathroom tiles you need based on your bathroom measurements. Make sure that your calculation is correct to prevent over- or underestimating the number of tiles, but always ensure you add a few more for any mistakes (like cutting them to wrong measurements or breakage). Remember to take into account the gaps between each tile when calculating the number of tiles you need.
- Gather all your tools before you get started on the installation. If you do not have some tools needed, consider renting instead of buying them to save money. The cheaper and most practical way to complete your tools is by renting those that you do not have.
Installing Bathroom Tiles
Although installing tiles in your bathroom can be time-consuming, with a little bit of do-it-yourself skills you can be certain of a rewarding result doing it carefully and taking your time not hurrying through the whole process.
- Prepare the bathroom floor subsurface. Ensure that it is flat, dry and free from any dirt, grease, and other particles. Fill small holes and cracks with compound fillers and ensure that there are no moisture problems.
- If you want, do a dry-run by laying the tiles on your floor and plan out to make sure you get a result that is satisfactory. Once you’re satisfied with the dry-run result, you can start laying down the tiles.
- Lay the first tile at the center of your bathroom floor. Do not begin at one corner or you might end up having halved tile at the walls. Work your way outwards from the center. With a trowel, spread adhesive just enough to cover the floor area about one square meter. It is easier to work in small areas, as it may dry before it is used if you spread it on a larger area.
- If you are using tiles with self adhesion, simply take off the adhesive covering at the back and press the tiles in place. If you make a mistake, lift the tile immediately and realign it. Remember to do this quick because once the adhesive dries, the tile will be more difficult to reposition.
- Once you’re done with laying down whole tiles, you can start cutting the border tiles that go against the walls. To get the right measurement for cutting, place the tile you want to cut exactly above the last whole tile in the same row. Place another tile over it (making a stack of three), and butt this top tile against a skirting board or the wall. Trace the edge of the topmost tile onto the second tile to mark the tile that you have to cut. Cut with a tile cutter.
- Lay down the edging tiles.
- Once you have all the tiles laid, grout the ceramic tiles or seal the cork tiles. Then allow one day for the adhesives to dry properly before grouting or sealing the tiles. Vinyl tiles only need to be polished after tiling.
- If you are using ceramic tiles, make sure that the color of the grout you use compliments or matches the color of your tiles. Mix the grout according to the instructions. Work with a small amount first, preferably just enough to cover a square meter of floor at a time. Then use a damp rubber sponge to wipe excess grout.
- For cork tiles, use a factory-applied sealer coat to seal the surfaces. Use one application of wax polish or polyurethane sealer for synthetic cork tiles, while natural cork tiles need at least three coatings. Leave each coat to dry for one day before applying another.

