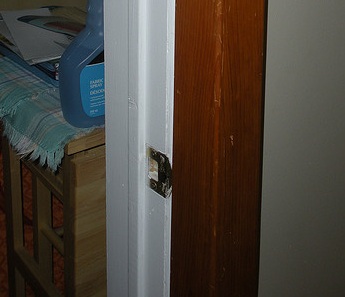
Install A Door Jamb Light Switch
The general function of installing a door jamb switch is to add a light in a closet and you don\’t have to manually turn it on and off the light. The door jamb switch is also more reachable than a regular light switch inside the closet. Furthermore, they are not expensive and can be used on regular hinged doors. You will also save more money as there is no need to worry about turning off the light. Here are the steps on how to install
a door jamb light switch.
You will need:
- Door jamb light switch
- 14 gauge
- 2-conducter wire
- Drill
- Hammer
- Mounting screws
- Wire nuts
- Screwdriver
- Chisel
Steps:
- First, choose the place where you want the switch to be installed. Usually, the switch will be installed above the top hinge if there is enough space for it. Switches are mounted on the hinged side of the door jamb. To mark out on where you want to cut the door jamb, use the mounting template that comes with switches.
- Then, use the drill bit to drill out the corner holes. Remove the rest of the wood with chisel until you have the depth to install the switch junction box. Calculate the depth of the hole. On the back of the switch junction, determine where the knockout is. Insert the switch junction box into the hole using the knockout as a guide. Mark the wood with a pencil and then drill into the mark through the door jamb and into the wall cavity.
- Next, turn on any power to the circuit. Insert a 2-conducter wire from the light down through the hole in the wood and into the back of the switch junction box through the knockout. Insert the switch junction box into the door jamb. Use the supplied screws to fasten it to the wood.
- Then, connect the ground wire to the grounding screw. Connect the black and white wires to the terminals individually or wire tails coming off the switch. Fold the wires into the junction box carefully and put the cover plate on. Disconnect the feed hot wire or the black wire from the light fixture once you have located it in the light junction box. Splice the feed hot wire to the white wire going to the door jamb switch. Put a wire nut on the connected wires to cap the wires. Connect the black wire from the door jamb switch to the hot terminal or black wire pigtail on the light.
- Fold the wire back into the light fixture junction box carefully and remount the light fixture to the junction box. Test the switch by opening and closing the door once the power is turned back on.
By now, you have successfully installed your door jamb light switch. There will be no problem in seeing well now and no dark areas have been well-taken care of.
Image Credit:
Additional Reading:
Build Like a Pro Windows and Doors: Expert Advice from Start to Finish (Taunton\’s Build Like a Pro)
Installing and Hanging Doors (For Pros By Pros)

