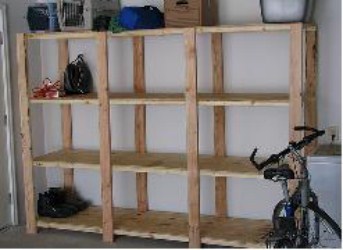
 Sometimes when you have a lot of items to keep in your store or garage, you really do not know where to put all the things. This is where the storage shelf will come in handy as a utility for putting all the items you wanted to keep in a very tidy manner. Custom storage shelf is much cheaper than the commercial shelving units which also do not maximize space utilization. Below are some of the steps for you in order to build your own storage shelf.
Get All The Building Supplies To Make Your Shelf Here
What you need:
- Wood or planks
- Hammer
- Screwdrivers
- Pencils
- Tape Measure
- Builder\’s square
- Saw
- Clamps
- Sandpaper
- Spirit Level
- Protective equipment
- Drill
Method:
- First of all, you need to determine exactly where you want to place the storage shelf (the area) and then measure the available area, plus also what items that you want to place on the storage shelf after you have completed making it. Always remember that along with these measurements, you will also need to determine its width, height and depth, its distance between shelves, type of wood materials to be used and also ensure that the top shelf has enough distance between the ceilings for you to put your things.
- A simple freestanding shelving unit can be built by just using planks, strips of 1 x 1s, and also a screwdriver. The thickness of the planks is also important and it depends on what items that you want to place on top of it. If you use thin planks, the shelf will bow under the weight that will be placed on it. For example, if you are building a bookshelf that is only three or four feet wide, the appropriate width of the plank should be at least 10-inch, while its thickness is 1-inch. For storing can food items in a small area, you can use plank that comes with 4-inch width and 3/4-inch thickness.
- The next step in building the storage shelf unit is cutting the vertical boards which will form the side of the units to length. Then, measure the planned distance between the shelves and make sure to mark those on the vertical boards.
- After that, you have to cut pieces of 1-by-1 which is long enough to reach across the vertical boards, and two pieces are needed for each of the shelves units. Then, you have to screw the pieces securely into place on the two vertical boards at the area that you have marked earlier for your shelf positioning. You have to ensure that it is perfectly straight same line with the other one because these will serve as the supports for each of the shelves in your storage unit.
- For the next step, you need to cut the top board of the shelving unit where its length will be the finished width of the shelving unit. This will be attached to the top ends of the vertical planks forming the top level of the unit.
- Then, cut shelves that will span the distance between the sides of your shelves, starting from the bottom until the top. Each of these shelves must be placed on their 1-by1 supports and also ensure that they are securely screwed into place. Now, you have finished building your own storage shelf and although the unit is designed as a freestanding unit, always take extra precaution in bracketing the shelves securely to the wall for preventing any untoward accidents in future.
Additional Reading:
http://www.popularmechanics.com/home_journal/home_improvement/1276101.html
http://www.essortment.com/hobbies/buildingstorage_szoo.htm
http://www.ehow.com/how_2031829_build-garage-cabinet.html
http://www.home-shelving-guide.com/build-your-own-shelves.html
Image Credit:
http://www.flickr.com/photos/milelandpix/2743161034/

