When it comes to security systems I do know a thing or two, especially about cameras. You can get standard video cameras, but lately network or IP cameras have become much more common place. You can get wired or wireless security cameras now depending on your needs. I’ve dealt with regular wireless cameras and they’re spotty, but wireless cameras that use wi-fi are much better, but even better is the wired variety as you never have to worry about interference of any kind. So, as promised, I’m back with another security camera for you to check out. Geeks.com was kind enough to provide it to me for review. It’s a wired IP camera that features pan and tilt control with night vision ability. So read on…
Infrared Motion Night Vision Network Color Camera w/Pan & Tilt Control, Microphone
Keep an eye on your business or home with this Infrared Motion Night Vision Network Color Camera!
The APM-J011 features a built-in Web server which supports remote viewing and/or management of the IP camera from a standard Web browser on any computer, anywhere and anytime. It features a built-in microphone and a motion detection alarm that helps keep your environment under a watchful eye!
With ten Infrared LEDs, the APM-J011 is ideal for low or no light viewing. The useful Pan/Tilt feature gives you a wide view of your surroundings! Get a clear picture with 640 x 480 resolution and a video frame rate of up to 30 fps. It also supports a variety of network protocols including HTTP/TCP/IP/UDP/STMP/DDNS/SNTP/DHCP and FTP!
Add additional security where you need it most with this APM-J011 Infrared Motion Night Vision Network IP Camera!
General Features:
– Powerful, high-speed video protocol processor
– Ten (10) IR LEDs
– MJPEG video compression
– High sensitivity 1.4-inch color CMOS sensor
– Resolution: 640 x 480 (VGA), 320 x 240 (QVGA)
– Video Frame Rate: 30 fps (QVGA), 30 fps (VGA)
– Minimum Illumination: 0.5 Lux @ F2.0
– Remote Pan/Tilt rotate
– Supports control P/T through IP network
– Supports up to 9 users online simultaneously
– Supports Image Snapshot
– Built-in 10/100 Mbps auto MDI/MDIX Ethernet interface
– Flip mirror images: vertical/horizontal
– Light frequency: 50 Hz, 60 Hz or outdoor
– Multi-level users management and passwords definition
– Built-in Web server, supports remotely viewing and/or management of the camera from a standard Web browser on any computer, anywhere and at anytime
– Supports Dynamic IP (DDNS) and UPnP LAN and Internet (ADSL, Cable Modem)
– Motion detection alarm
– Supports multiple network protocols: HTTP/TCP/IP/UDP/STMP/DDNS/SNTP/DHCP/FTP
– Built-in microphone
Specifications:
– Video Compression: MJPEG video compression
– Video Resolution Adjustment: 640 x 480 (VGA), 320 x 240 (QVGA)
– Video Parameters: Brightness, contrast
– Video Frame: 30 fps (QVGA), 15 fps (VGA)
– Communication Interface: 10/100 RJ-45 port
Unit Dimensions: 4.5 x 3.8 x 4.25-inches (H x W x D, approximate)
Price: $57.99
Let’s start out with the video unboxing:
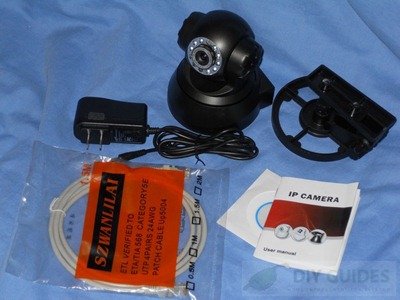
So that was the video, but let’s recap what’s in the box shall we?
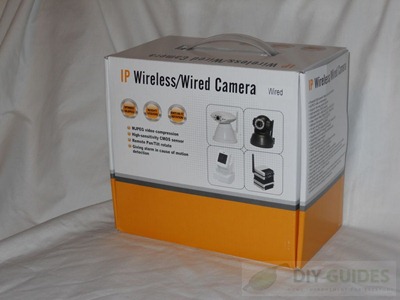
It’s what one might call generic, or no-name. There’s no branding on it, but it’s very similar to other cameras out there.
Inside the box you’ll find mounting screws, ethernet cable, mount, power supply, software CD, user manual and the camera of course.
The mount is plastic, but it feels nicely made and sturdy so it should stay in place wherever you put it. The camera can be mounted right side up or upside down with the mount. It all depends on the space you have and the position you need the camera in. The camera attached with a thumbscrew only, it screws right into the base of the camera. The arm can be positioned and secured with the two thumbscrews on the side, it stays at the angle you put it.
The camera has dimensions of 4.5 x 3.8 x 4.25-inches so it’s not too big or too small really, it’s tall actually.
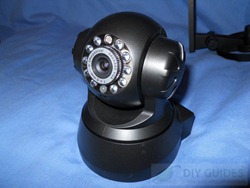
On the front you’ll see the 10 infrared LEDs along with an LED indicator on the bottom and a sensor on the top. The outer ring turns to allow you to focus the camera manually.
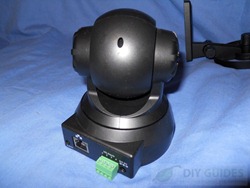
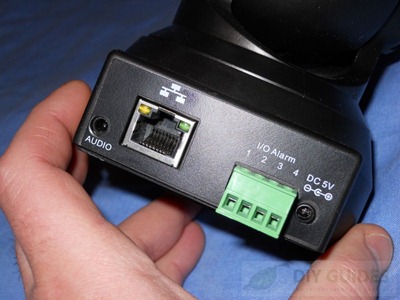
On the back of the camera at the base you’ll find a few connections for audio, ethernet, input/output alarms and the power connection.
Installation is just like any other IP camera, connect the power and Ethernet cables where they need to go and you’re set. You can install the software if you want, but it’s very basic it just tells you the IP which you can grab from your network router easily. It does allow you to change some settings but it’s all the same that you can access from the main interface which you access via the IP address.
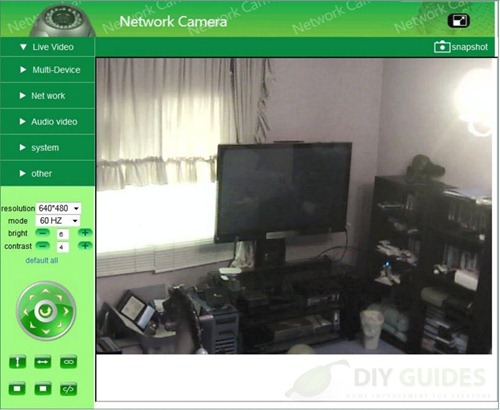
When you log into the camera you’ll be greeted with the LiveView at first. On the left side you’ll see a menu with options for Live Video, Multi-Device, Network, Audio Video, System and Other. Under the menu you’ll find options for resolution, mode and the ability to adjust brightness and contrast. At the bottom are directional controls for pan and tilt, just press a button and the camera moves. Below those controls are buttons for roaming mode, the camera will actually move on its own and scan the area in a pattern.
The lens appears to be slightly wide angle, it takes a lot of room in which can be a good thing so you can see more that you need to.
Here’s a couple sample snap shots taken with the camera at the highest resolution of 640×480. I have a chandelier and it’s sort of in the picture so that’s the bright light on the top right side. The colors are quite a bit off though. My computer down there is black metal but it looks more gray or blue, and my carpet is actually dark brown but it really looks light blue or light gray doesn’t it? I tried going in and finding some kind of settings for the colors but there wasn’t any, just those for brightness and contrast.
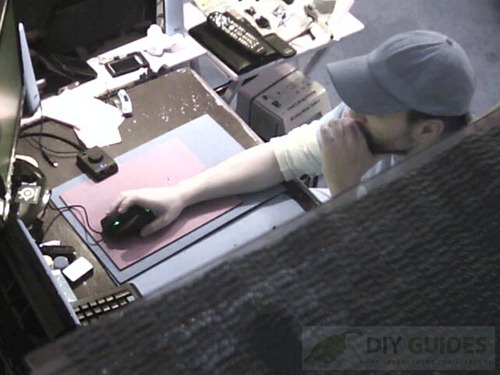
Here’s another one with the camera moved and it’s a closer view. The rug still looks rather blue here. I have a black deskpad, a dark blue large mouse pad and a red on on top of that. I don’t know why I have two mousepads, I was testing them a while back and they just stayed there. Anyway, the black and the dark blue do not look the right color at all here. It’s odd actually as some black things do look the right color but others don’t and I don’t know why. My hat is dark blue as well but it doesn’t look it at all.
Let’s take a look at the rest of the interface options. Under Multi-Device you’ll find three choice for Upgrade Device Firmware, Restore Factory Settings and Reboot Device. The choices for Restore and Reboot are just buttons that make it do those things.
The next choice is Network with choices fro Basic Network Settings, Wireless Lan Settings, ADSL, UPnP and DDNS. yes there are wireless settings there, I’m guessing the same exact software is used for the wireless version as well.
The next options is Audio Video, but it’s just two choices for Mirror and Reverse that pop up over on the left side off of the screen.
The next is System with options for Device Info, Alias Settings, Data & Time, User Settings, Decoder Settings, PTZ Settings, Backup and Restore and Log. You can click the pictures to see a bigger view.
The last option is Other with choices for mail, FTP and Alarm Settings.
The interface works but it’s generic, no surprise there really.
You can use the camera for security through the software but I prefer using my NAS box it’s a Synology DS210+ that allows me to easily monitor my cameras while I’m away. I hooked it up to my network and went into the security settings of the NAS and after a bit of work I found it worked well. Not as good as the IP camera I’m using now but still not bad. I could use the pan and tilt features through the NAS box, but it wasn’t as fast or as precise as doing it through the main interface.
This camera is inexpensive considering it does feature pan and tilt but the colors are way off and I don’t think you could actually use it to really identify someone or at least what they’re wearing correctly. Yes you could use it just for regular monitoring to see what’s going on but that’s about it. The picture quality is fairly decent once you adjust the focus.


